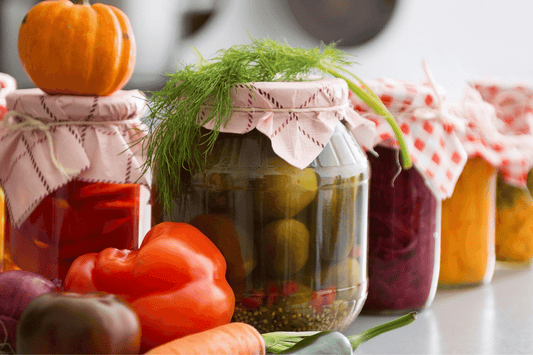
We all love summer fruits and vegetables, we’re sure you have your favorites, and here at the Cue Test Kitchen, we do too! A few members of the Cue team each selected their most loved summer produce and included their favorite way to prepare them using Cue’s precision temperature control.
Our team of Chefs and Culinary Scientists have determined the optimal temperatures to cook each vegetable to achieve a dish worthy of applause. With precision cooking, you never have to worry about burning or overcooking all these delicious summer vegetables. As a bonus, since you’ll be cooking everything in a pan, you won’t overheat your home with the oven during the sweltering summer heat.
So, consider this your official excuse to celebrate summer. Choose your favorite from below, and get cooking! Oh, and by the way, we also added some tips & tricks to make you feel like a pro!
Corn
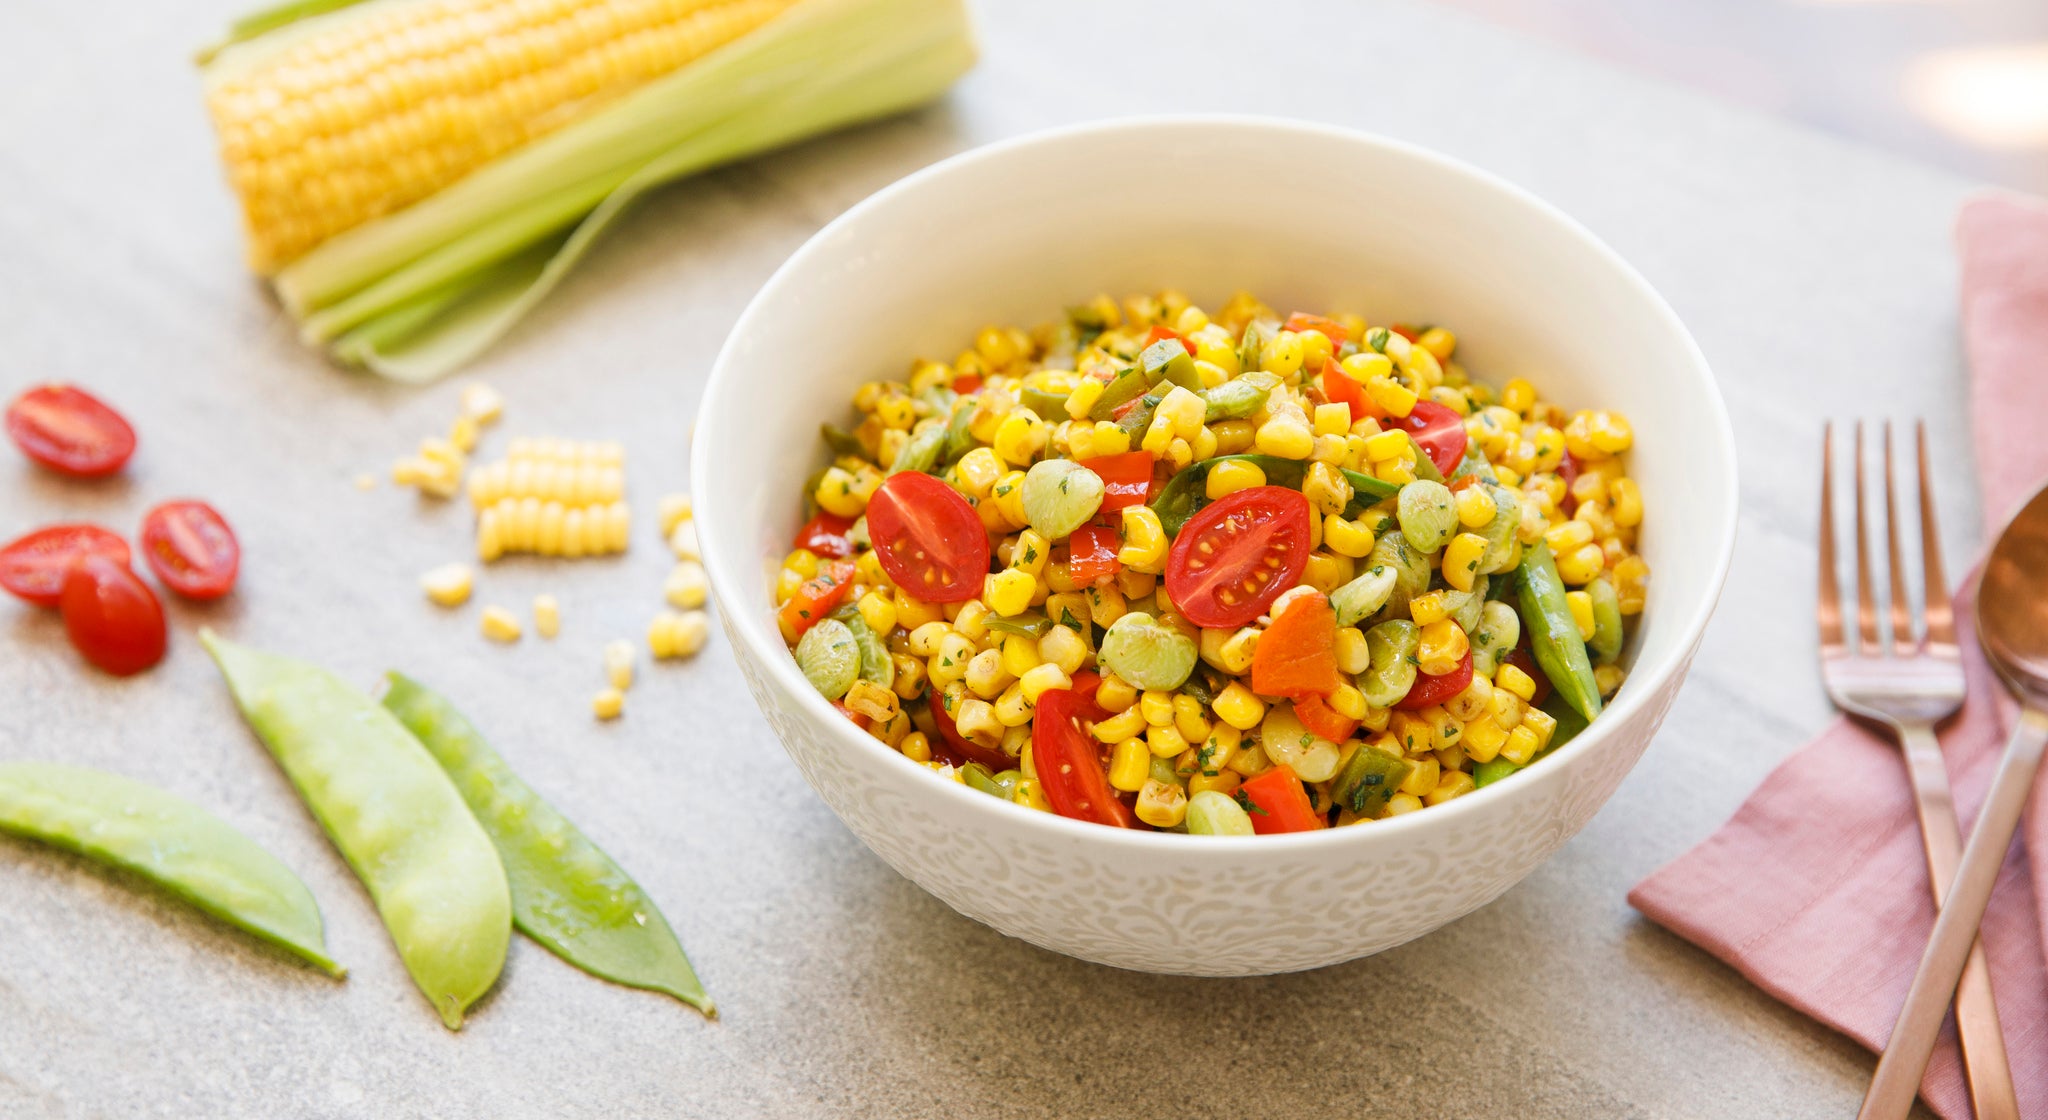
 Fresh corn is the epitome of summer if you grew up in Western Massachusetts like our product designer Rebecca did. But, let’s be honest, it doesn’t matter where you grew up, everyone loves corn! And why wouldn't you? It’s sweet, tender, versatile, tastes like sunshine and it is always comforting.
"When I make corn, I love to shave fresh corn off the cob and roast it with a little bit of butter (about 1 tsp per ear). I love the way the butter browns with the corn. If I find the corn to be a little too sweet for my palate, I like spread it across multiple dishes like mixing some into a green salad or adding it to frittatas or soups. I really enjoy seasoning the corn with fresh basil right before I serve it to really bring summer to the table!"

Pro Tips
- Make sure silks are gone before cooking, they can burn easily.
- You can replace butter with olive oil for a lighter flavor.
- Make a delicious chilled soup by adding chicken or vegetable stock after pan roasting, season with salt and pepper, and then blend until smooth. Allow to chill in the fridge and enjoy!
- You don’t have to throw away those leftover corn cobs. If you simmer them in water you can create a delicious corn stock, to use as a base for chicken soup, lobster chowder, or even Ramen.
Green Beans

 Green beans are one of the most under-rated vegetables to come out of summer. Most home cooks just steam or blanch them before seasoning with olive oil, salt, and pepper. But, If you really want to show off, char your green beans. A charred green bean is just as rich and flavorful with salt and pepper as it is with a quick reduction of sauce like in our Chinese Blistered Green Beans (find this recipe in the Cue app). However, Chef Christina also loves adding some sliced garlic and Sichuan peppercorns in the last few minutes of cooking to spice things up.
"When I make green beans I cook them with avocado oil because I don’t want them to smoke. First I set my temperature to 475°F in control mode and char my green beans. Arrange your green beans in a single layer to avoid steaming. You may have to do this in batches. After they have a good char, I reduce the temperature to 400°F and add in sliced garlic and up to a teaspoon of crushed Sichuan peppercorns. Saute for 30-90 seconds until the garlic and peppercorns are fragrant and toasted- not burnt. Together with the garlic, the Sichuan peppercorns add a citrusy numbing heat to the sweet summer green beans."

Pro Tips
- Use a high smoke point oil to avoid burning or smoking before the green beans are charred such as peanut, avocado, sunflower, or grapeseed.
- Toss in hoisin sauce and sesame oil for a quick Asian inspired side dish
- Add into a grain salad for a complete easy meal
- You can also use this technique with Shishito or other hot peppers
Zucchini/Summer Squash
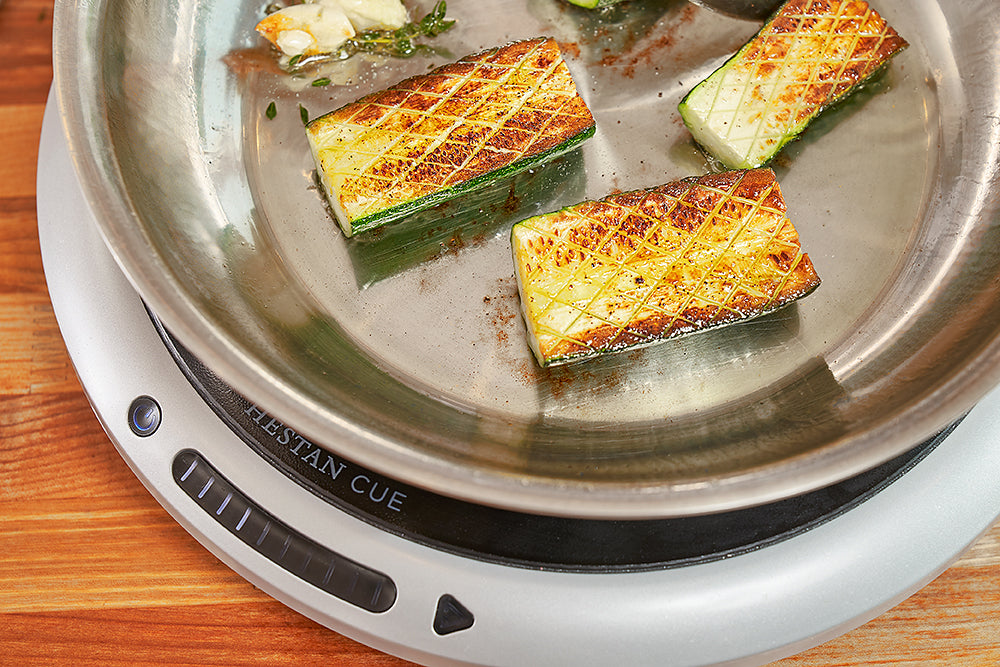
 If you have ever tried to grow zucchini and squash at home, then you know how quickly you can go from, “Ooh look, we have a zucchini”, to “Oh No! What am I supposed to do with all of these zucchini!”
Luckily, Chef Aldana, our resident Farmer/Chef has been there too, and she has a few tricks besides zucchini bread that can help you utilize all of your squash.
"I love pan-roasted zucchini because it brings this vegetable off the sidelines and into the spotlight. I love to serve them with a light drizzle of lemon juice, and freshly grated parmesan cheese. For simple pan-roasted zucchini, I cut each zucchini in half lengthwise and then into 3-4 inch pieces. I then score the surface of each piece in a criss-cross pattern with the tip of my knife, only going about ⅛” deep, this will help them cook faster, and produce a creamy texture.
Once all of the squash is prepped, I set my pan to 350°F in control mode and add a couple of tablespoons of olive oil. When the pan is hot I add 3-5 zucchini and roast them for 5 minutes on each side. You know the zucchini is fully cooked when a fork or knife can easily pierce the squash with little to no resistance. After the zucchini is done, I remove them onto a baking rack or towel lined plate and continue until I have cooked all of them. I finish by seasoning with lemon juice and parmesan cheese before plating with a bright summer salad."

Pro Tips
- Finish the squash with a drizzle of balsamic and olive oil for a quick side dish
- Toss the squash with cooked pasta and garnish with fresh lemon juice and chopped parsley
- Pour whisked eggs over the squash pieces to make a quick frittata
- You can also use this technique with eggplant
Still have too much zucchini?
- Grate the zucchini, wring out the moisture with a lint free towel or cheesecloth, and freeze in zip tight bags for future zucchini breads.
- Or, after grating and wringing out, make zucchini cakes or “latke” style cakes and freeze them flat with parchment paper in between. Then you can thaw as needed and pan fry for a quick snack.
- You can wash the zucchini and cut into batons or slices, then pour hot pickling liquid for a quick summer pickle!

Eggplant
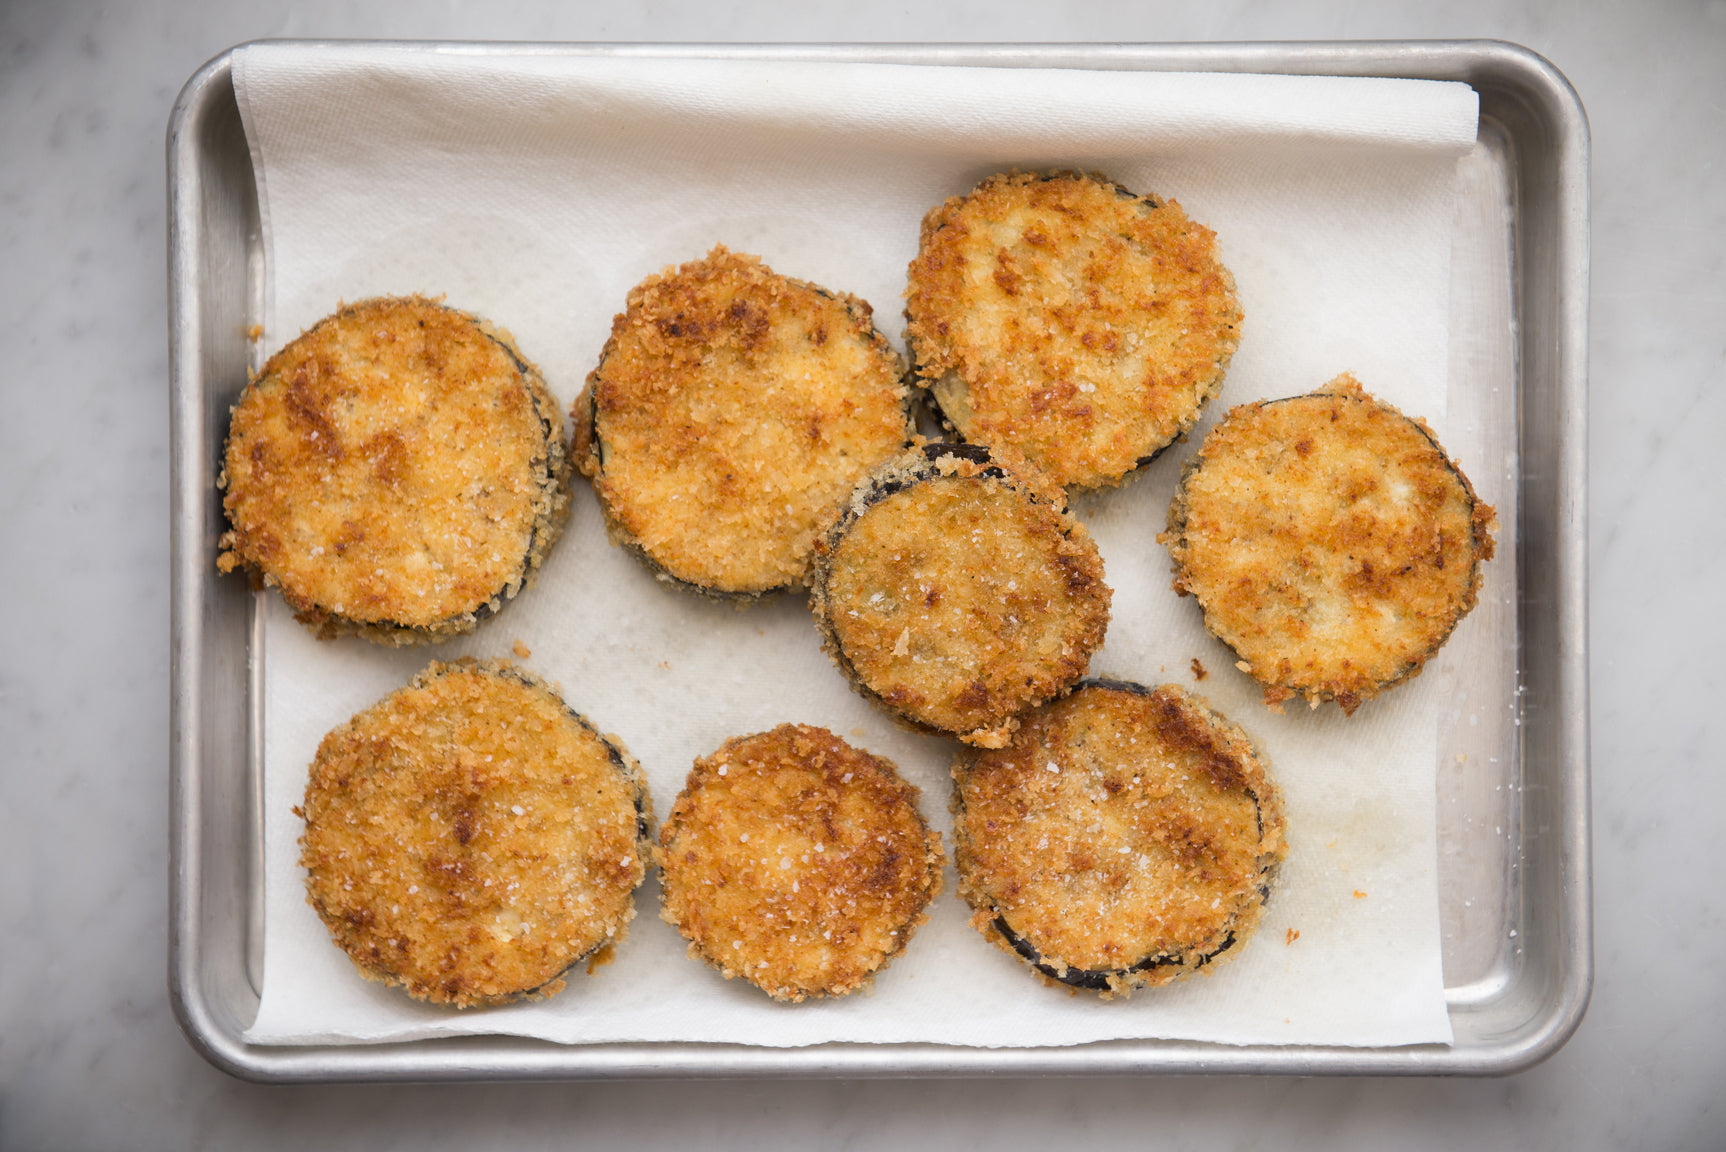
 Growing up around New York City an Eggplant or Chicken Parmesan sandwich feels more comfortable in Julian’s hand than a probe thermometer. “They are good for every occasion and every season” insists Julian. “The sandwich is even better when eaten with one hand while walking quickly and talking with your other hand”...we don’t get it either...must be a New York thing.
Slice an eggplant on a bias to produce ½“ thick slices that are not too long and have a nice angular edge. Season each slice with salt and set them aside on a paper towel. In the meantime, set up your dredging station by preparing one bowl of flour, one bowl of whisked eggs, and one bowl of bread crumbs (Italian or Panko). I like to season all of my bowls with a little salt, pepper, and dried thyme.
Prepare your pan by adding ¼ cup of olive oil and heating to 375°F in control mode. As your pan is heating, dredge a few slices of eggplant by lightly tossing them in flour, then dunking them into the eggs, and lastly coating them in breadcrumbs.
Once you have a few slices coated in breading you can add them to the pan. You should be able to fit 2-4 slices at a time. Cook for 5 minutes on each side before removing onto a baking sheet or towel lined tray. Repeat until all of the eggplant slices are cooked.
While your eggplant is frying, slice your preferred bread in half. I like to use Italian bread, french bread, or dutch crunch. I typically spread a little butter and garlic on the inside of my rolls and give them a quick toast before I make my sandwiches. You should also find your favorite tomato sauce and heat that up. Once you have crispy eggplant, hot tomato sauce, and a roll, you are ready to build your sandwich.
Start by placing the crispy eggplant on the roll and top with tomato sauce, Mozzarella cheese, and freshly grated parmesan cheese. Flash the sandwich open-faced under a hot broiler to melt the cheese before closing the sandwich and digging in. I personally love this sandwich because it makes me feel like I’m home, even though I’m 3000 miles away in the Test Kitchen.

Pro Tips
- Use up to ¼ cup of oil, if the oil level runs low, just add more between batches.
- Season the sliced eggplant before breading to ensure better flavor and to release some of the moisture. This also helps the cooking and ensures the breading will adhere better.
- Always use the flour/egg/breadcrumb method to avoid the breadcrumbs from getting soggy and peeling off.
- You can season your breadcrumbs with herbs, spices, grated parmesan, or replace it with panko or crushed corn flakes.
- You can bake the finished eggplant slices in a casserole with tomato sauce and mozzarella cheese for a casserole style dinner.
- After breading, and before cooking, you can freeze the eggplant slices flat with parchment paper in between. Then you can thaw and pan-fry anytime.
- You can also use this technique with zucchini or green tomatoes.
Heirloom Tomatoes

 Heirloom tomatoes are a blissful treat in the summer. Brightly colored, sweet and savory, they are delicious simply sliced and sprinkled with salt. But adding a quick sear builds layers of flavor and complexity that make these summer gifts shine. Our Managing Director, John likes to use these to elevate date night mixed with a Caprese or watermelon salad.
"I love the vibrant colors and rich flavors of heirloom tomatoes, which is why I like to put them into simple salads. A Caprese salad of mostly tomatoes, mozzarella, and basil, or a watermelon salad with tomatoes, watermelon, feta, and mint or basil, are both best with top quality ingredients. Adding a quick sear to the heirloom tomatoes in these salads will gives my guests a wonderful surprise, by elevating even the simplest culinary forms.
I look for tomatoes that are on the firm side, even in shape and if they have a fun new color, even better. I then slice my tomatoes about ½” thick and let them sit in a 5% salt water solution for 10 minutes (5g of salt per 95g water). After 10 minutes, I carefully remove the slices and transfer them to a paper towel lined tray to thoroughly dry them off.
While the tomatoes are drying, preheat your pan to 450°F in control mode and add a couple of tablespoons of a high heat oil. Once the tomato slices are dry, slide them into the oil and sear them for about 2.5 minutes on each side. After searing remove them to a fresh paper towel. You can sear more tomatoes here, or start building your plate. I love to show off the deep color of the sear by fanning out the tomatoes and mozzarella."

Pro Tips
- Use a high smoke point oil to avoid burning or smoking such as vegetable, peanut, avocado, sunflower, or grapeseed.
- Dry the sliced tomatoes as much as you can with paper towels or lint-free towels. Drying them will help prevent sticking and will allow the sugars to caramelize before the juices start releasing.
- You can brine your tomatoes in a 5% salt-water solution before drying. This is a great technique to ensure seasoning and, because salt removes excess moisture, the tomatoes will sear better!
- Seared tomatoes are great when drizzled with chopped shallots and sherry vinegar.
- Enjoy with any seared or grill seafood.
- Dice it up after charring and mix into your favorite salsa or guacamole.
- Use as a topping for bruschetta.
Stone Fruit
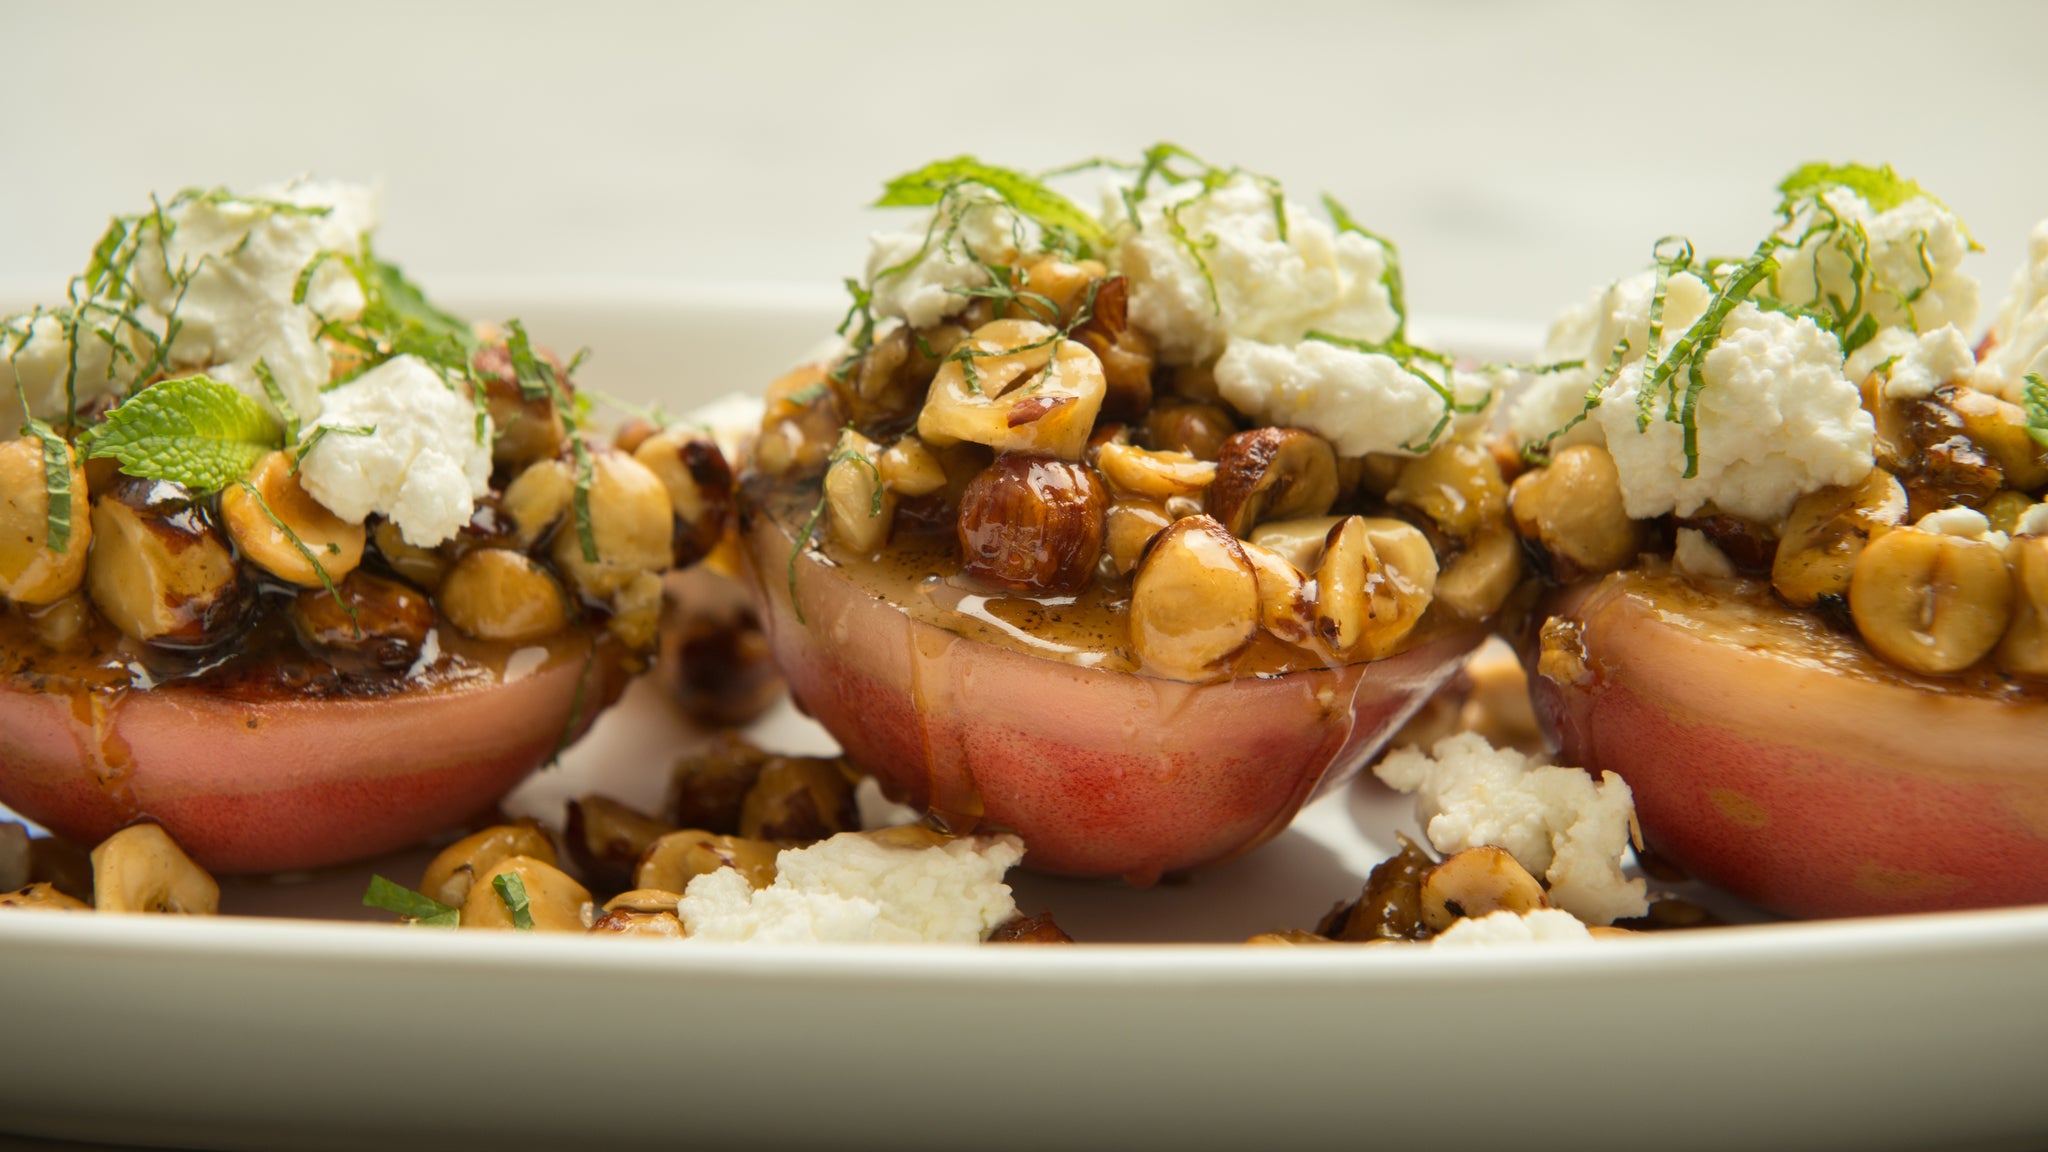
 If there is something more summer than a peach cobbler, plum granita, or cherries jubilee then you should tell us, because we want to try that too. Stone fruits are the epitome of summer since they are at their peak sweet, juicy, ripe-ness. Owen is from the Central Valley in California, a stone’s throw away from the verdant landscapes of Steinbeck’s East of Edan. He grew up celebrating summer with peaches still warm from the summer sun. Roasting stone fruit is a great way to emulate and build upon the qualities of this summer treat. It will turn a “plain ol’ fruit” into an “epic side dish”. Here’s Owen’s favorite way to capture his summer memories.
"Stone fruit is a catchall for summer fruits that have a pit, like Plums, Apricots, Nectarines, Peaches, Cherries, even Mangos. Showing off with stone fruit is all about keeping it simple. All it takes is good ripe fruit and a little sear. You want the fruit to have a slight give, hold the entire fruit in your hand and gently squeeze, using your palm more than your fingers. This will let you judge how ripe the fruit is without potentially damaging it for later.
Once you have picked the perfect stone fruit, slice them in half and remove the pit. You can keep your fruit in halves, or you can break them down further, I like halves because I can fill each half with ingredients later, like little boats of delicious-ness.
In control mode heat your pan to 400°F and add a little bit of high temperature oil. Once heated place your fruit cut side down on the pan and allow to sear for about 5 minutes, repeat on any other cut sides you want to caramelize.
Once your fruit is cooked it will be a little softer, extraordinarily aromatic, and you will find that it tastes “more”; meaning the flavor of the fruit has been enhanced by the cooking.
I love to serve my seared stone fruit with a little bit of whipped goat cheese, fresh mint, and a balsamic reduction. You can also take a peek at the Roasted Peach Salad recipe in the Cue app for another great flavor combination."

Pro Tips
- Use a high smoke point oil to avoid burning or smoking such as canola, peanut, avocado, sunflower, or grapeseed.
- Chop after searing and add into salsas. Try combining with diced red or yellow bell pepper, lime juice, chopped cilantro, olive oil or even cilantro, chopped shallots, lime juice and teriyaki sauce for a quick Hawaiian-style salsa.
- Add into a fresh green salad and top with your favorite dressing.
- Drizzle honey, toasted nuts, and some goat or blue cheese for a dinner party.
- Use alongside a cheese plate.
- Use to filled crepes or top pancakes.
- Serve alongside BBQ pork, brisket, and lamb,
- Enjoy with ice cream, sorbet or whipped cream.
We hope you feel inspired to get cooking or discovered a new way to cook an old favorite. Either way, tell us what you think. Show us what your cooking or ask our Chefs for advice in our Facebook community. Let’s stretch that summer for as long as we can!
For more recipe inspiration check out the Cue app, where you can discover over 500 chef crafted recipes, all with step-by-step video guidance from prep to plating. Download the Hestan Cue app for iOS and Android and learn more about precision cooking with Cue, and all the things you can do!